Do you love scrapbooking? Are you looking for a way to take your hobby to the next level? If so, Cricut may be just what you are looking for! Cricut is a cutting machine that allows you to create unique scrapbook pages and other crafts easily. This definitive guide will show you how to use Cricut to its full potential. We’ll teach you everything from creating basic pages to advanced techniques like die-cutting and embossing. So what are you waiting for? Let’s get started!
What is Scrapbook?
A scrapbook is a collection of photographs, clippings, and other memorabilia that tells the story of a person’s life. Can create Scrapbookfor any subject, including family history, travel, or a specific interest or hobby. The earliest scrapbooks date back to the 15th century, and the practice of creating them has continued to popularity in the modern era. Today, many people use digital scrapbooks to create and share their memories with others. However, there is something special about flipping through a physical scrapbook and seeing the moments of your life unfold before your eyes. Whether you’re looking back on happy memories or preserving precious moments for future generations, scrapbooks offer a unique way to tell your story.
What kind of Cricut Can I make Scrapbook?
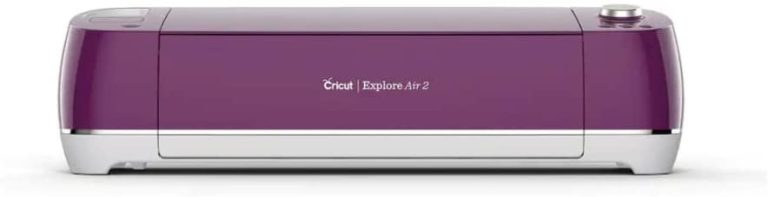
There are several different kinds of Cricut machines that you can use to make scrapbook pages, each with its own set of features and capabilities. The most popular options include the Cricut Maker, Explore Air 2, and Create Space. Each of these models comes with unique software, materials compatibility, and design functions, so you should take some time to consider your needs and preferences before deciding on a specific machine. For example, if you plan on using a lot of thicker materials like balsa wood or vinyl, you may want to opt for the Cricut Maker. Alternatively, if you prefer digital designs over physical ones and have an extensive collection of fonts and images on hand, the Explore Air 2 might be a better fit. Ultimately, only you can decide which Cricut is suitable for your scrapbooking needs!
What supplies do you need to make a scrapbook on Cricut?
To create a scrapbook using Cricut, you need a few basic supplies. First, you will need a paper that is compatible with your machine. There are two main types of paper to look for – plain card stock and printable adhesive sheets. You will also need photos and other embellishments that you can cut out or print onto the paper with the Cricut. Some scrapbookers like to use stickers, journaling cards, or die cuts for this purpose, while others enjoy creating their designs from scratch with the help of design software. In addition, you may want to invest in some cutting mats for your machine since you’ll be doing a lot of cutting! With these basic supplies in hand, you can start creating beautiful scrapbooks using your Cricut.
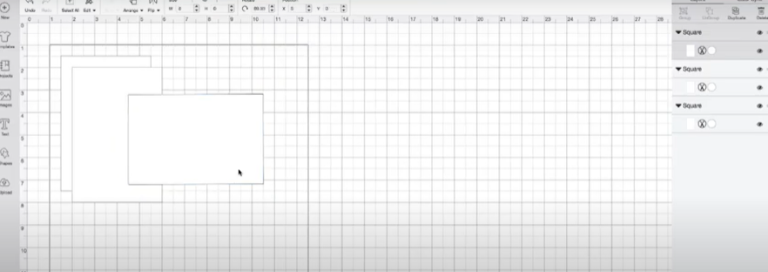
How to design your scrapbook pages in Cricut Design Space
The first step in designing your scrapbook pages in Cricut Design Space is to choose the right size and orientation. Cricut gives you a variety of pre-set sizes and layouts to choose from, or you can opt to create your custom design. Once you have selected a template, you can add photos, embellishments, stickers, and other decorative elements. You can also take advantage of the many different filters and editing tools available in Design Space to improve the look of your page. Any changes you make will automatically be applied across all pieces on your page, allowing you to create a cohesive and polished look. Designing your scrapbook pages in Cricut Design Space is a simple yet creative way to showcase your favorite moments and memories.
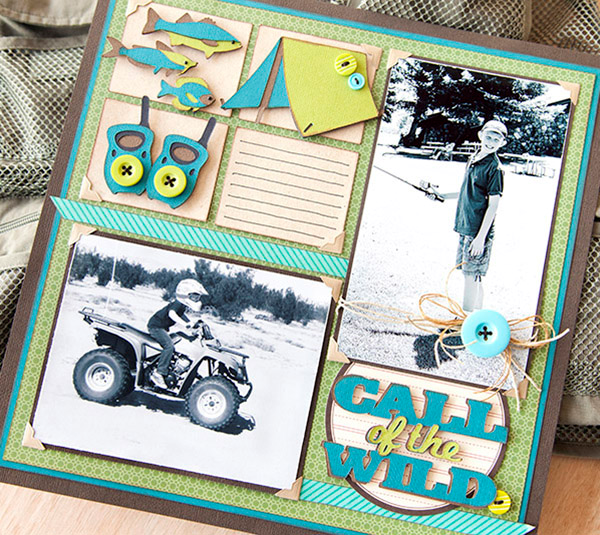
How to add text and images to your project
Are you looking for a unique and personal way to document your life? If so, consider creating a scrapbook with Cricut Design Space. With Cricut Design Space, you can easily add text and images to your pages, allowing you to create a truly one-of-a-kind scrapbook. Here’s how:
To add text to your scrapbook pages, select the “Text” tool and type in your desired text. You can then use the different fonts and colors to customize your text.
To add images, select the “Images” tool and choose from the thousands of images available in Cricut Design Space. You can also upload your images, such as photos or illustrations. Once you’ve selected a picture, you can use the editing tools to resize, crop, or rotate it. Then, drag and drop the image onto your scrapbook page.
With Cricut Design Space, adding text and images to your scrapbook pages is easy and fun. So get started today and see how easy it is to create a one-of-a-kind scrapbook that will be cherished for years!
How to bind your finished scrapbook
Now that you’ve put the finishing touches on your scrapbook, it’s time to bind it together. There are a few different ways to do this, but we’ll walk you through the most common method. First, gather your supplies: a bone folder, a glue stick, scissors, and a ruler. Then, measure and cut your binding paper to size. Next, use the bone folder to score the fold line. It will make it easier to get a crisp fold. Now, apply glue along one long edge of the binding paper and attach it to the first page of your scrapbook. Be sure to align the fold line with the edge of the page. Continue gluing and attaching until all of the pages are bound together. Finally, trim any excess paper from the edges. And that’s it! Your scrapbook is now ready to display or share with friends and family.
Conclusion
So there you have it – our comprehensive guide to making the perfect scrapbook with your Cricut machine! We hope you found this information helpful and that you are now inspired to create a beautiful scrapbook of your own. Don’t forget to share your finished projects with us on Instagram or Facebook – we can’t wait to see them!