Do you want to learn how to seal spray paint? You’ve come to the right place! In this blog post, we will teach you everything you need to know about sealing your spray-painted projects. We will discuss the different types of sealers available and how to choose the right one for your project. We will also show you how to apply the sealer for the best results. So, whether you are a beginner or an experienced painter, this guide is for you!
What is spray paint, and why do you need to seal it
Most people have used spray paint at some point in their lives, whether for art projects, DIY repairs, or other purposes. But what exactly is spray paint, and why is it important to seal it? Spray paint is aerosol paint that comes in an aerosol can and is sprayed onto surfaces using a nozzle. It is typically used for painting large surfaces such as walls or ceilings. It can also be used for smaller projects such as painting furniture or picture frames. One advantage of spray paint is that it dries very quickly. However, it can also be more challenging to control than other types of paint. For this reason, it is essential to seal spray paint with a varnish or other type of sealant. This will paint from chipping, fading, or peeling.
The different types of sealers and how to choose the right one for your project
There are many different options to choose from when it comes to sealers. But with so many choices, how do you know which one is right for your project? Here’s a quick guide to the most common types of sealers and their uses:
– Polyurethane sealers are durable and resistant to both water and oil, making them ideal for countertops, floors, and other high-traffic areas. They come in water-based and oil-based formulations, so choose the right one for your project.
– Acrylic sealers are less durable than polyurethane, but they’re much easier to apply. They’re also resistant to most household cleaners, making them suitable for kitchen and bathroom surfaces.
– Lacquer sealers are very durable and have a high shine, making them ideal for furniture and cabinets. They’re available in both water-based and solvent-based formulations.
– Shellac sealers are the most durable option, but they’re also the most difficult to apply. They’re usually used for high-gloss finishes on furniture and cabinets.
Now that you know the different types of sealers, it’s time to choose the right one for your project. Here are a few things to keep in mind:

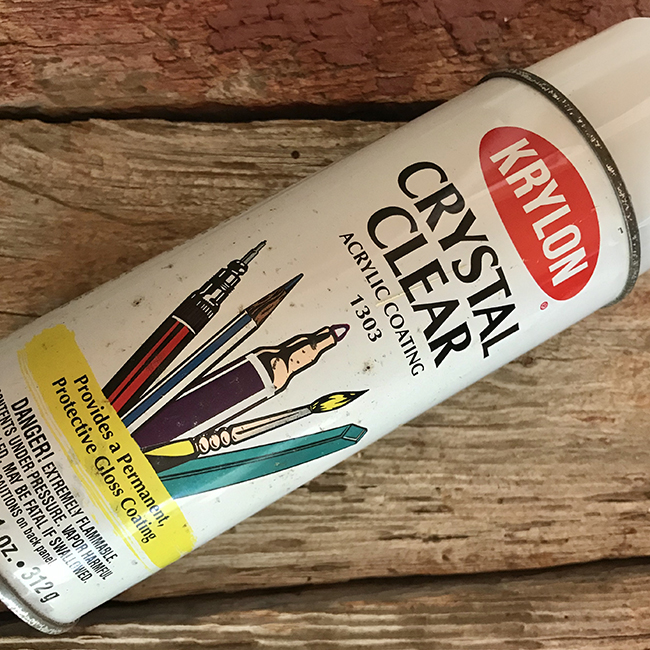
- Acrylic sealer spray provide a protective, clear finish
- Give a glossy luster to virtually any indoor or outdoor project
- A durable protective finish
- Applies clear and dries gloss
- Spray-on formula goes ono simply and evenly.
- Available in a 6 ounce spray can
- Contains no CFCS-in accordance with federal regulations

- CONVENIENT SIZE - This 12 oz clear acrylic sealer is a must-have to your art supplies
- GLOSSY, CRYSTAL CLEAR FINISH - When dry, this easy-to-use formula dries to a glossy, clear finish that will make your arts and crafts glisten
- USE ON MULTIPLE SURFACES - This easy to use spray sealer works great on wood, metal, canvas, terra cotta and so much more
- EASY CLEAN UP - After completing project, turn can upside down and spray to keep nozzle from clogging
- TRUSTED BRAND - For over 50 years Mod Podge has been America's favorite glue, sealer, and finish. Mod Podge Gloss Acrylic Sealer is proudly made in the USA

- Triple thick glaze's high solids formula quickly builds a bright, clear coating giving the illusion of depth
- One coat equals three coats of many other clear aerosols
- Used on many types of materials wood plaster, bisque, metal, plastic and paper
- Many other uses in studio, home crafts and shop projects
- Comes in 12-ounce
– The type of surface you’re sealing: Choose a sealer that’s compatible with the material you’re working with. For example, you wouldn’t use an oil-based sealer on a laminate countertop.
The surface will see the traffic: Choose a more durable sealer if your project is in a high-traffic area. Conversely, if it’s in a low-traffic area, you can get away with a less durable option.
– The look you’re going for: If you want a high-gloss finish, choose a sealer that will give you that result. Conversely, if you’re looking for a more natural finish, choose a sealer with a lower sheen.
Once you’ve chosen the suitable sealer for your project, it’s time to apply it. Follow the manufacturer’s instructions carefully, and allow ample time for the sealer to dry before using the surface. With a bit of care, your project will be protected from dirt, moisture, and wear for years to come!
How to apply the sealer and achieve the best results
When applying a sealer to your countertops, there are a few things you’ll want to keep in mind to achieve the best results. First, make sure that the surface is clean and free of any debris or oil – this will help the sealer adhere better. Second, apply the sealer evenly and in thin coats – too much sealer will take longer to dry and result in a sticky or tacky surface. And finally, be sure to allow adequate time for the sealer to dry completely before using the countertop – typically 24 hours. These simple tips will help you get the most out of your sealer and make your countertops look their best.
Tips and tricks for sealing spray paint like a pro
Sealing spray paint is a great way to protect your surfaces from wear and tear. Here are some tips and tricks to help you seal your spray paint like a pro:
- Use a primer before applying your sealer. This will help the sealer to adhere better and last longer.
- Apply the sealer in thin, even coats. This will prevent drips and streaks.
- Let each coat dry completely before applying the next one. This will ensure that the sealer bonds properly with the paint.
- When you’re finished, buff the surface with a soft cloth to give it a nice sheen.
These tips will help you get professional-looking results when sealing your spray paint. So don’t be afraid to experiment and have fun!
Can I use sealing spray paint on wood?
Yes, you can use sealing spray paint on wood. It’s a great way to protect your wood surfaces from wear and tear. Just be sure to follow the instructions on the can carefully.

What are the benefits of using sealing spray paint?
Sealing spray paint provides a durable, protective finish that helps extend your surfaces’ life. It also resists staining and fading, making it ideal for high-traffic areas.
How often should I seal my spray-painted surface?
It is best to apply a new coat of sealant every few months or as needed. This will help to keep your paint job looking its best.
Do you need a clear coat over spray paint?
When you spray paint something, the paint goes on smooth and even, but it can look a little dull. A clear coat will make it shiny and protect it from scratches. It’s up to you whether you want to use one. If you’re painting something for fun, you probably don’t need a clear coat. But if you’re painting something that you want to last, like a piece of furniture, then a clear coat is a good idea. You can buy spray paint with a clear coat already built-in or buy separate cans of spray paint and a clear coat. Either way, it’s easy to apply. Just make sure you follow the directions on the can.
Conclusion
So there you have it – everything you need to know about how to seal spray paint and keep your projects looking great for years to come. By following these simple steps, you can ensure that your work will be protected from the elements and look fabulous no matter where you decide to display it. Have you tried sealing spray paint before? What tips do you have to share? Let us know in the message section. Happy Crafting!


