Are you getting ready to paint your walls but not sure how to prep them properly? Don’t worry; you’re not alone. Many people don’t know how to prepare walls for painting correctly, leading to frustration and wasted time and money. In this blog post, we will walk you through the process of preparing your walls before painting, step-by-step. By following these instructions, you’ll be able to avoid common mistakes and get the job done quickly and efficiently!
Remove all switch plates and outlet covers.
Before you start painting, it’s essential to remove all Switchplates and outlet covers that you don’t think about until you need to remove them. But when the time comes, it’s necessary to know how to do it correctly. First, find the screws that hold the plate in place. There will be two screws in most cases, one at the top and one at the bottom. Use a screwdriver to remove the screws, being careful not to strip them. Once the screws are removed, the plate should come off quickly. Gently pry it off with a putty knife or your fingers if it doesn’t. With the dish out of the way, you should now access the switch or outlet. Be sure to turn off the power before removing the switch or outlet.
Tape off trim, door frames, and ceilings
When you’re painting a room, it’s essential to take the time to tape off all of the trim, door frames, and ceilings. It Will helps you avoid getting paint on these surfaces and make your finished product look excellent. It’s definitely worth the extra effort! First, you’ll want to cover any flooring that might get damaged by paint. Next, use painter’s tape to create a clean line between the wall and the trim. Once you’ve done that, you can go ahead and start painting! Just be sure to remove the tape before the paint can dry. Otherwise, you’ll end up with a big mess!
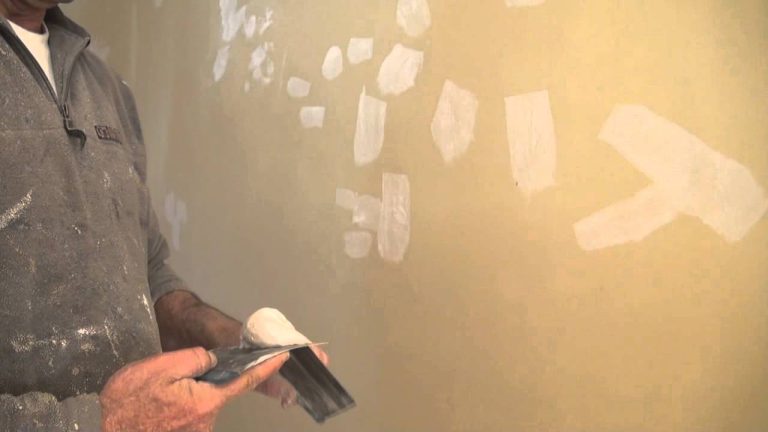
Sand down any rough patches or areas with peeling paint
Sanding down rough patches and areas with peeling paint is necessary for prepping a surface for painting. It smooths out the surface, making it even and consistent. It also primes the surface for painting, helping the paint adhere better. Additionally, sanding helps to remove any loose paint chips or debris that could interfere with the final finish. When sanding, use fine-grit sandpaper and work in small sections. Once sanding the entire surface, wipe away any dust with a damp cloth. Allow the surface to dry completely before proceeding with painting.
Wipe down walls to remove any dust or debris
It’s always a good idea to give your walls a quick wipe down now and again. Not only does it help to remove any dust or debris, but it also gives you a chance to check for any cracks or damage that might need to repair. When wiping down walls, use a clean, soft cloth. You can also use a damp sponge for tougher stains. Just be sure to wring it out well before using it on your walls. Once you have finished, be sure to throw away the cloth or sponge to avoid spreading any dirt or bacteria around your home.
Apply primer to the walls
Most everyone has had to paint at some point in their lives. And for those who haven’t, now is as good a time as any to pick up a brush and learn! Whether you’re painting your first wall or your hundredth, you should always keep a few basics. One of the most critical steps in painting is applying primer to the walls. Primer provides a smooth surface for the paint to cling to, and it also helps to cover up any flaws or imperfections in the wall. In addition, primer can help extend the life of your paint job by protecting the paint from damage and wear. So next time you’re getting ready to paint, make sure you take the time to apply primer to the walls.

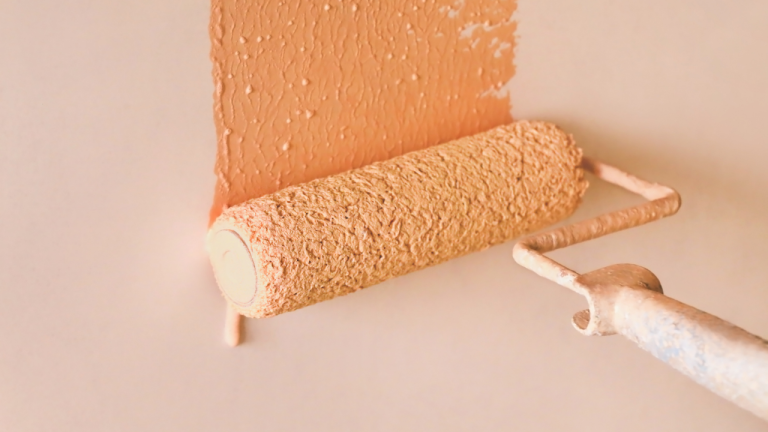
Paint the walls your desired color
Choosing the right paint color for your walls can be a daunting task. There are so many options to choose from, and it can be hard to know where to start. However, painting your walls is a great way to add personality to your home, and it can be a fun project to take on. If you’re unsure which color to choose, consider what mood you want to create in the room. Do you want it to be cheerful and bright? Relaxing and calm? Once you have a general idea of the atmosphere you’re going for, you can narrow down your choices. Another thing to keep in mind is the amount of natural light in the room. A sunny room can handle it.
If you’re planning on painting your walls, there are a few things you’ll need to do beforehand to prep them properly. Here are answers to some frequently asked questions about how to prep your walls before painting:
What type of cleaner should I use?
You’ll want to use a mild soap or detergent and water to clean your walls. You can also use a chemical cleaner specifically designed for prepping walls for painting, such as TSP (trisodium phosphate). Follow the instructions carefully and ventilate the area well when using strong cleaners.
Do I need to remove all the old paint?
Not necessarily. If the old paint is in good condition and you’re happy with the color, you can apply a new paint coat over the top. However, if the old paint is peeling or flaking, or if you’re looking for a drastic color change, you’ll need to remove the old paint first. The best way to do this is to sand it down until smooth.
How do I know if my walls are ready for painting?
Once you’ve cleaned and sanded your walls, you should give them a quick once-over to look for any cracks, holes, or other damage that needs to be repaired. Once you’ve taken care of any repairs, your walls should be ready for painting!
We hope this guide has helped answer some of your questions about how to prep your walls before painting.
What kind of surface am I going to paint?
The surface you’re painting will determine the amount of prep work required. For example, if you’re painting over bare drywall, you’ll need to sand down any rough edges and apply a primer. But if you’re painting over a previous coat of paint or wallpaper, you’ll need to do more prep work to ensure the new paint adheres properly.
What kind of paint am I going to use?
The type of paint you choose will also affect your prep work. For example, if you’re using water-based paint, you won’t need to do as much prep work as oil-based paint. Water-based paints are easier to work with and clean up, suitable for beginners. Oil-based paints provide a more durable finish, but they can be challenging. If you’re unsure which type of paint to choose, consult a professional painter or your local hardware store staff.
When should I start painting?
Ideally, it would help if you started painting when the weather is mild and dry. Avoid painting in direct sunlight or very humid conditions, as this can cause the paint to dry too quickly or unevenly. If you must paint in hot weather, try to do so in the morning or evening when it’s not as hot.
What is the best way to apply paint?
There are a few different ways to apply paint, but the best way will depend on the color and the surface you’re painting. For example, if you’re using a brush to paint trim or detailed areas, you’ll want to use a small brush with synthetic bristles. For larger surfaces, such as walls, you can use a roller. Be sure to read the instructions on your paint can carefully before starting.
Conclusion
So, there you have it! Your complete guide to prepping walls before painting. By following these simple steps, you’ll be on your way to a beautifully painted wall in no time at all. Got any questions? Leave them in the message section, and we’ll do our best to help out. Happy painting!

