
Do you need to know how to address envelopes with the Cricut? If so, you’re in luck! Addressing envelopes can be a daunting task, but it can be a breeze with the help of your Cricut machine. This blog post will show you how to do it step-by-step. So what are you waiting for? Let’s get started!
What is Cricut?
Cricut is a machine that can use for cutting, scoring, and drawing. It comes with several different blades and pens, which can use to create different designs on paper, cardstock, vinyl, fabric, and other materials. The machine is controlled by computer software, allowing users to create their designs or select from a library of pre-made designs. Cricut machines are popular among crafters and scrapbookers as they allow for exact and intricate cutting. In recent years, devices have become more affordable and easier to use, making them accessible to a broader range of people. Whether you’re looking to create custom cards or unique home décor, a Cricut machine can help you bring your vision to life.
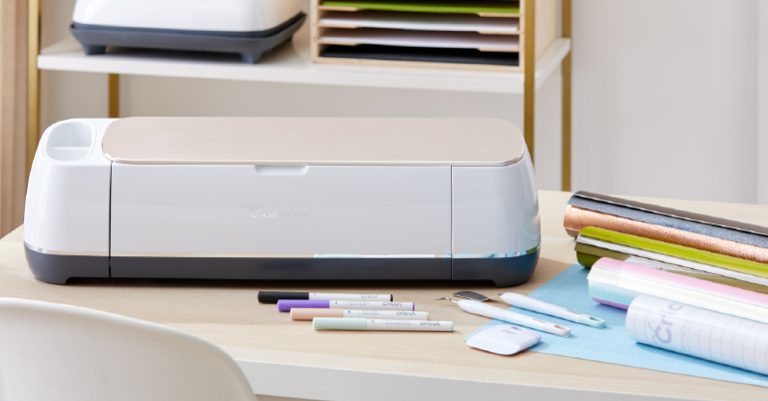
What Cricut Machine do I need to address envelopes?
If you own a Cricut machine, you probably already know that you can use it for various projects. However, you may not know that you can also use it to address envelopes. While there are a few different models of Cricut machines, the Explore Air 2 is the ideal choice for addressing envelopes. With its built-in Bluetooth, you can easily connect it to your computer or laptop and design your envelope labels using the Cricut Design Space software. Once you’re done designing, the Explore Air 2 can precisely cut your labels, making it quick and easy to get professional-looking results. So if you’re looking for a Cricut machine that can help with your envelope-addressing needs, the Explore Air 2 is a perfect choice.
What supplies do you need to address envelopes with the Cricut machine?
If you’re looking to add some personalization to your envelopes, the Cricut machine is a great option. All you need is a printer and some basic supplies. For starters, you’ll need some cardstock or heavy paper. You’ll also need a pen or pencil to trace around the template. And of course, you’ll need the Cricut machine itself. Once you have all of your supplies, follow the instructions that come with the device. You’ll have custom-addressed envelopes that are sure to impress your friends and family in no time at all.
How do you create a new project in the Cricut software?
Before you can start creating with your Cricut machine, you’ll need to download and install the Cricut Design Space software. Once the software is installed on your computer, you can create a new project by clicking on the “New Project” button in the upper left-hand corner of the screen. It will open a blank canvas where you can design your project from scratch or upload and edit existing images. To upload a photo, click on the “Upload” button in the upper left-hand corner of the screen. It will open a menu where you can choose to upload an image from your computer or search for a picture online. Once you’ve found an image, you want to use, click on it and click the “Insert Images” button. You will now insert it onto your canvas. From here, you can edit it to your heart’s content! When you’re finished, click on the “Save” button in the upper right-hand corner of the screen and give your project a name. That’s all there is to it! Now you’re ready to start crafting with your Cricut machine.
Which fonts are available for use in your addresses, and how do you choose one?
There are a lot of different fonts out there, and it can be tough to choose the right one for your address. You want something easy to read but that also reflects your personality. If you’re not sure where to start, take a look at some of the most popular fonts used for addresses:
-Arial: A classic sans-serif font that’s simple and easy to read.
-Helvetica: Another popular sans-serif font that’s perfect for addresses.
-Times New Roman: A classic serif font that exudes sophistication.
-Courier New: A sturdy serif font perfect for formal addresses.
Once you’ve chosen a font, be sure to test it out by writing out your address in it. It will help you make sure it’s legible and looks the way you want.
How to Address envelopes with the Cricut
Addressing envelopes can be a time-consuming task, particularly if you have a lot of invitations to send out. If you’re looking for a way to speed up the process, the Cricut machine can be a big help. With the Cricut, you can create customized labels for your envelopes in just a few minutes. First, gather the supplies you’ll need: envelopes, label paper, and a pen or pencil. Next, insert the label paper into the Cricut and use the software to design your labels. Once you’re satisfied with your design, please print out the labels and cut them out using the Cricut. Finally, apply the labels to your envelopes, and you’re ready to go! By taking advantage of Cricut’s capabilities, you can save yourself a lot of time and hassle when addressing envelopes.
What is the best way to print out your envelope designs to look their best when mailed out?
When it comes to printing out your envelope designs, you can do a few things to ensure that they look their best when mailed out. First, be sure to use high-quality paper. It will help your envelopes look professional and prevent them from getting damaged in the mail. Second, use a printer with high-resolution settings. It will help your design looks its best when printed out. Finally, if you are hand-addressing your envelopes, use a clear, legible font. It will help ensure that your envelopes arrive at their destination safely and on time. By following these simple tips, you can be confident that your envelope designs will look great when they arrive in the mailbox.
FAQs on How to Address Envelopes with the Cricut
One question we get a lot here at Cricut is how to address envelopes using our machines. While it may seem like a daunting task, it’s actually pretty easy! Here are a few FAQs that will help you get started.
Do I need a special pen or cartridge to write on envelopes?
Nope! Any pen or cartridge that is compatible with your Cricut machine will work just fine. We recommend using a pen with a narrow tip for best results.
Can I use my Cricut to print address labels?
Absolutely! Just load your label sheet into your printer and select the “print” option in Design Space. Then, simply position your labels on your envelopes and run them through your Cricut.
What if I don’t have an electronic cutting machine?
No problem! You can still use your Cricut to address envelopes by hand. Simply position your paper on the cutting mat and use the blade to score along the fold lines. Then, gently fold along the scored lines and glue or tape your envelope shut.
Conclusion
So there you have it! Addressing envelopes with the Cricut is easy and fun. We hope you’ll give this a try the next time you need to address some envelopes. Thanks for reading!

