Are you having trouble changing your Cricut blade? It can be a little tricky the first time, but with this easy guide, you’ll be able to do it in no time! Changing your Cricut blade is needed to keep your machine in good condition. Follow these simple steps, and you’ll be able to do it yourself without any problems.
What is Cricut Blade?
A Cricut blade is a cutting tool used with a Cricut machine. The edge is responsible for cutting the material placed in the machine. Several different types of blades are available, and each one has its unique purpose. It is essential to understand the different types of knives and what they can be used for so that you can make the best choices when selecting the right blade for your project.
There are three main types of Cricut blades: the standard blade, the deep-cut blade, and the extra-deep-cut blade.
The typical blade is the most basic type and is perfect for simple projects. The deep-cut edge is for cutting thicker materials, such as leather or denim. The extra-deep-cut blade is ideal for cutting even more dense materials, such as matboard or foam-core.
These blades are for specific purposes, and each one has its unique properties. Some of the most popular specialty blades include the precision blade, the textured blade, and the perforation blade.
The precision blade is perfect for cutting intricate designs and details. The textured edge is to give your projects a textured finish. And the perforation blade is ideal for creating perforated lines in your projects.
Choosing the right Cricut blade for your project is essential for ensuring a successful outcome with so many different edges.
It isn’t easy to know which one is right for you by understanding the different types of blades. You can make the best decisions when selecting the right edge for your needs.

How Do you know when it’s time to change your Cricut Blades?
Well, the most obvious sign is that your cuts are no longer as clean and precise as they used to be. If you’re noticing more tearing or jagged edges on your projects, it’s likely time for a blade change. In addition, if your machine starts making strange noises while it’s cutting, that’s another indicator that it might be time to replace the blade.
What are the things needed before Changing Cricut Blade?
To change the Cricut blade, you will need:
-A Phillips head screwdriver
-Your old Cricut blade
-New Cricut blade
How Do You Change a Cricut Blade?
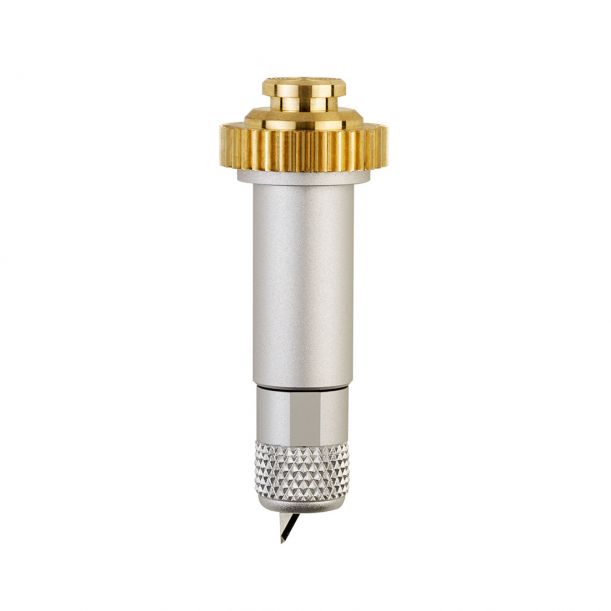
Changing a Cricut blade is easy and can be done in just a few minutes. All you need is a screwdriver to remove the screws on the side of the machine. Once you remove it, you can pop off the top and change the blade. Be sure to put everything back together correctly so that your appliance works properly.
When it’s time to change your blade, you’ll know it. The old edge will start to look dull and worn out, and it won’t cut as well as it used to. That’s when it’s time for a new blade!
There are a few different types of blades available, so be sure to choose the right one for your project. You can find blades in a variety of different sizes and shapes, so be sure to pick the right one for your machine and your project.
Once you have a new blade, it’s time to change the old one. Here’s how:
Step One: Remove the screws on the side of the machine.
Step Two: Remove any screws that may be holding down the old blade in place, such as those connecting to edges at other points along its length. If this isn’t possible, you can always unscrew them from their holes and try again later.
Step Three: With one finger, push down on the back of the blade to loosen it up. It should pop right out! Be careful not to cut yourself or damage anything else when doing this step.
Step Four: Replace the old blade with the new one. Be sure the new edge is seated correctly, so there isn’t any extra space between it and where your hands go when using it (this could cause injury).
Step Five: Screw the old screw back in place if necessary. You don’t want to strip out its hole or damage anything else! Just take care when doing this step, so everything is good as new.
Step Six: Replace the top cover and screws, then test out your machine! It should be working just like before.

How to change the blade on Cricut Explore Air 2?
You have to remove the housing cap on the top of the machine. There is a blade cartridge, and you slide out the old one and replace it with the new one. Ensure that the blade is facing the correct way and then snap the housing cap back into place. You can also find video tutorials on how to do this if you get stuck.
How to change the Cricut blade to the scoring wheel?
It is a question that many Cricut users have. The answer is straightforward. You need to remove the edge from the holder and replace it with the scoring wheel. The wheel should fit snugly in the holder, and you should be able to secure it in place with the screws.
It’s essential to ensure that the scoring wheel is in the position with the blade. You can do this by making a small mark on the side of the blade holder and then lining up the scoring wheel so that the pattern is in the middle.
You can also use the scoring wheel to make creases in your paper. It can be helpful if you’re trying to create a foldable project. Make a small score line where you want the fold to be, and then fold the paper along that line. The crease will be nice and sharp.
You can also use the snoring wheel to make an embossed design. You can do it by pressing down the paper while making the scoreline. The more pressure you apply, the deeper the embossing will be.
So, as you can see, the scoring wheel can be handy. It’s worth taking the time to learn how to use it properly. And once you get the hang of it, you’ll be able to create some fantastic projects!
How to store Cricut blades?
The best way to store your Cricut blades is by using a blade storage box. It will keep the blades organized and protected. Always ensure that the edges are stored safely where children and pets cannot get to them.
Conclusion
We have shown you the easiest way to change your Cricut blade. We hope that this article has been helpful and informative. If you have any questions or comments, please feel free to share them in the comment section below. Happy crafting!


