
Do you have an old lamp that you don’t use anymore? Or maybe a light that you never liked the style of? Today, we’re going to show you how to spray paint a lamp! It is a beginner’s guide, so even if you’ve never picked up a paintbrush before, you’ll be able to follow along. We’ll go over everything you need to know: choosing the right paint to prepare the surface. So grab your supplies, and let’s get started!
1. Remove the lampshade and light bulb
Removing the lampshade and light bulb before spraying the lamp is a simple but essential step. If you don’t, the paint can get on them and ruin them. Plus, it’s just a good idea to avoid getting paint on anything that will be close to your face when you’re using the lamp. So, take a few minutes to remove the shade and bulb before you start painting. It’ll save you time and hassle in the long run.
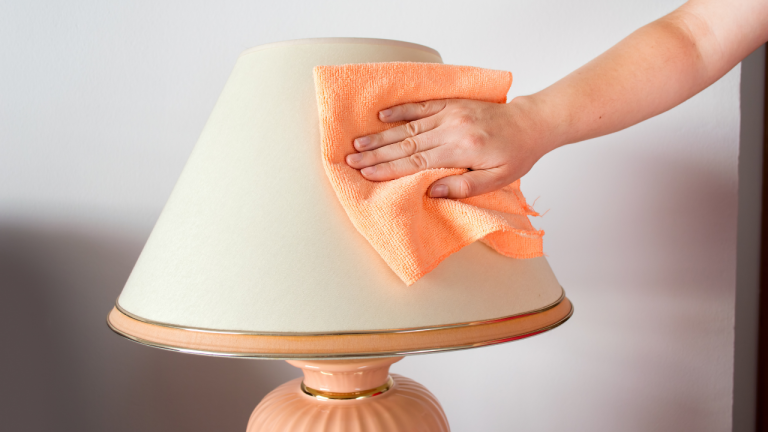
2. Sand down any rough areas or peeling paint
If you’re looking to give an old lamp a new lease on life, spray painting is a great option. But before you start, there are a few things you need to do to prepare the lamp. First, sand down any rough areas or peeling paint. It will help the new color to adhere better. Next, wipe down the lamp with a damp cloth to remove any dust or dirt. Once the lamp is clean and dry, you’re ready to start spray painting. Just be sure to do it in a well-ventilated area and use painters’ tape to protect any areas you don’t want to be painted. With time and effort, you can quickly transform an old lamp into something new and exciting.
3. Apply a coat of primer, let dry
To restore an old lamp that has been damaged by years of use or neglect, you will need to start by sanding down the surface. Once you have sanded down the entire lamp, you should apply a coat of primer to remove any remaining blemishes and smooth out the finish. Let the primer dry completely before moving on to the next step. Finally, once your primer is fully dry, you can add a fresh coat of paint or varnish to give your lamp a beautiful new look. With some hard work and a little patience, you can bring new life to an old light and give it a second chance at being enjoyed by generations to come!
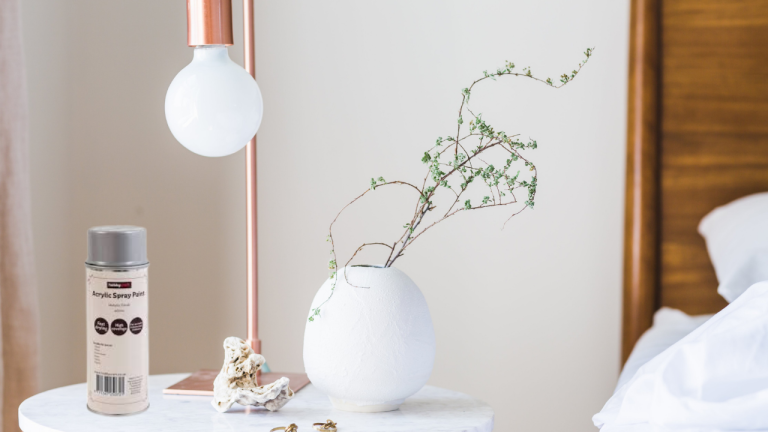
4. Spray paint in the desired color, let dry
To spray paint a lamp in your desired color, start laying it down on a flat surface in a well-ventilated area. Next, cover any areas you don’t want to be painted with some old newspaper or other protective covering. Then, open your can of spray paint and get to work! Be sure to hold the can about 10-12 inches away from the surface as you coat the entire lamp with even strokes. Allow the first coat to dry completely before applying a second coat if necessary. Finally, once your paint is fully dry, you can reassemble your newly-painted lamp and enjoy its bright new look!
5. Reattach the light bulb and lampshade
Now that you’ve finished your new paint job, it’s time to reattach the light bulb and lampshade. First, screw the light bulb back into the socket. Then, fit the lampshade over the top of the light bulb, and screw it in place. That’s it! Your newly painted lamp is now ready to use.
FAQs on How Spray Paint Lamp
If you’re looking to add a splash of color to your home décor, painting a lamp is a great way to do it! But before you start, there are a few things you should know. Here are some answers to frequently asked questions about how to spray paint lamps:
What kind of paint should I use?
When it comes to painting a lamp, there are several important considerations to keep in mind. First and foremost, you need to choose the right type of paint. There are many different paint formulations on the market today, and some will be more suitable for your particular project than others. For example, if you plan to spray paint your lamp, an oil-based enamel spray would be a good choice. This type of paint incorporates a durable clear coat that can help to protect your freshly painted surface from scratches and other wear and tear. Additionally, oil-based enamels often have very fine spray nozzles that allow you to get a smooth finish with minimal overspray or splatter. So when it comes to choosing the perfect paint for spraying your lamp, go with an oil-based enamel and you can’t go wrong!
How to choose the right spray paint color for the lamp?
When choosing the right spray paint color for your lamp, there are a few factors to keep in mind. First, it’s important to consider the existing decor of your room and which colors will best complement or contrast with it. You may also want to choose a paint that matches the furnishings or artwork in the space – this can help tie everything together and create a cohesive look. Other factors to consider include the size and shape of your lamp, as well as its intended purpose. For example, if you’re planning on painting an accent lamp that is typically used for mood lighting, a darker or richer color might be a good choice. On the other hand, if you’re working on a task light for reading, brighter colors may be more appropriate. Ultimately, when choosing spray paint for your lamp, it’s important to take all of these factors into consideration and go with whatever works best for your individual needs and preferences.
What kind of Sandpaper should I use on sanding the lamp?
When it comes to sanding, there are many different kinds of sandpaper that you can use. Some people prefer to use coarse-grit sandpaper, as this will allow you to quickly remove varnish and paint from the surface of your lamp. However, if you want a more precise finish, you may want to opt for a finer-grit paper. This will ensure that no scratches or pockmarks remain on the surface of the lamp when you are finished sanding. Ultimately, it is up to you which type of sandpaper will work best for your particular project, so just be sure to consider both the size and nature of the surface that you are sanding before making your choice. Whether you’re working with wood, metal, or glass surfaces, there is sure to be a suitable grit level for the job at hand. So go ahead and grab some sandpaper and get started! Your beautiful lamp will thank you!
What kind of Primer should I use on the lamp?
When it comes to priming a lamp, there are a few different options to consider. Some people prefer to use latex paint primer, as it is easy to apply and leaves a smooth finish. However, if you want to give your lamp an extra shine, then you may want to go with oil-based primer instead. This type of primer is great for creating a glossy sheen on the surface of the lamp. Another consideration is color – some people choose to use white or off-white primer, while others might choose something more vibrant like pink or blue that can really make their lamp stand out. Ultimately, the best primer depends on your particular needs and preferences. So when it comes time to start priming your lamp, think carefully about what kind of look you’re going for and choose the best option for your needs.
How long does it take for the spray paint job to dry on the lamp?
The question of how long spray paint takes to dry is a common one for many people who are interested in revamping their old, worn-out lamps. While the exact amount of time that it takes may depend on a variety of factors, such as temperature and ventilation, most experts agree that a high-quality spray paint job generally takes between 24 and 48 hours to fully cure. During this period, it’s important to avoid touching the lamp or putting it near intense heat, as that can damage the finish and leave unsightly smudges on the surface. Finally, once you’re sure that your paint has dried completely, you can begin enjoying your new, bright, and colorful lamp!
Conclusion
So, there you have it – your very own guide on how to spray paint a lamp! We hope you found this tutorial helpful and that you are now ready to give this project a try. Be sure to share your finished product with us in the message section below – we can’t wait to see it! Happy Painting!

