Do you want to change the fonts on your Cricut? It’s a lot easier than you might think! This step-by-step guide will show you how to change fonts on your Cricut in just a few minutes. Whether you want to use a different font for every project or have a specific font that you always use, changing the fonts on your Cricut is a great way to customize your projects. Let’s get started!
What is Cricut?
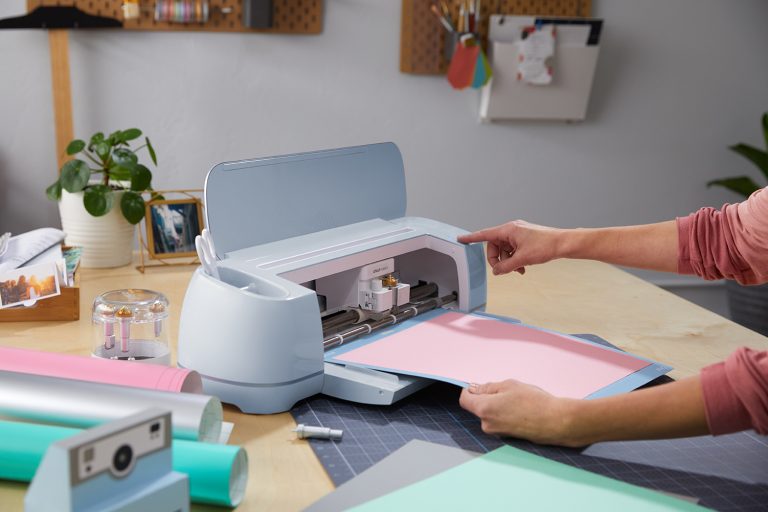
Cricut is a cutting machine that can be used to create various projects such as vinyl decals, paper crafts, and even fabric projects. One of the great things about Cricut is that it provides users with multiple fonts to choose from.
What is the Cricut Design Space Software?
The Cricut Design Space software is a free online app that allows you to design and edit images for your Cricut projects. You can use the software to create custom designs or edit existing ones. The software is also great for creating printable projects, such as labels, invitations, and greeting cards.
How to change fonts on your Cricut?
There are two ways that you can change fonts on your Cricut. The first way is to use the Cricut Design Space software. The second way is to use the Cricut app.
If you want to learn how to change fonts on your Cricut, read on for a step-by-step guide.
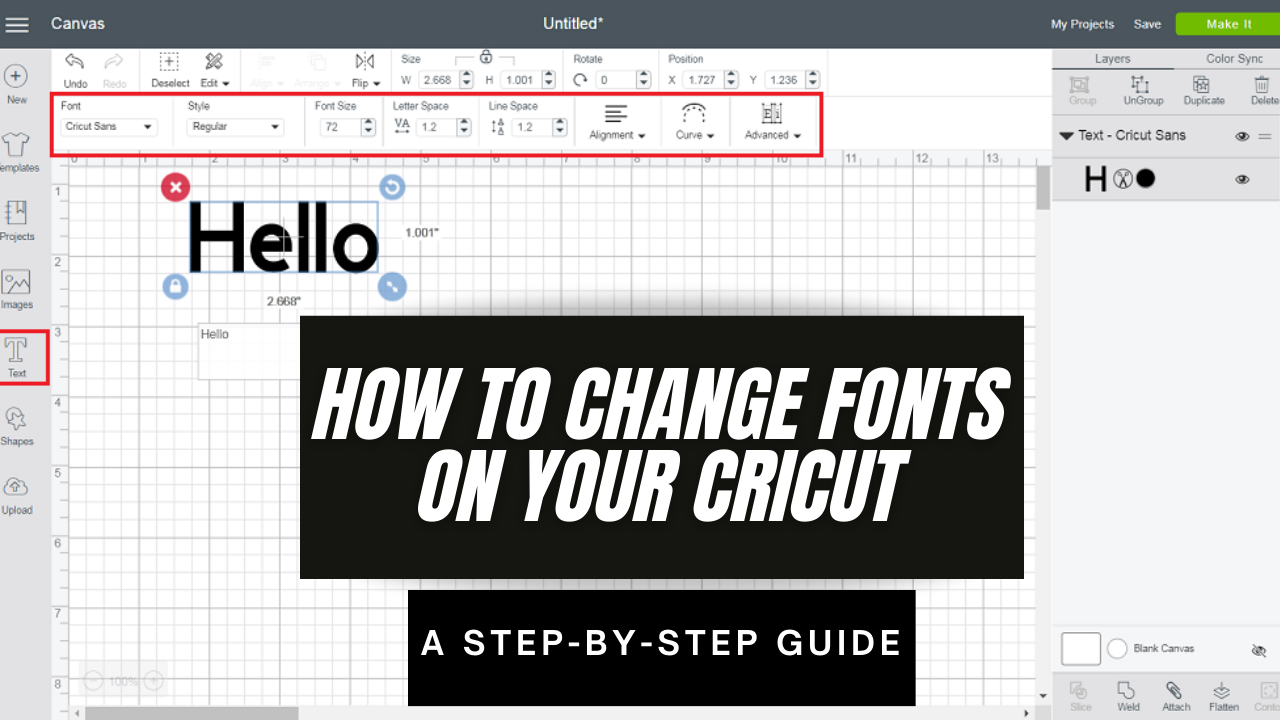
Step One: Choose a Font
The first step is to choose a font. To do this, open up the Cricut Design Space software. On the left-hand side of the screen, you will see a list of fonts.
Click on the Font you want to use and then click on the “Insert” button.
Step Two: Size the Font
The next step is to size the Font. To do this, click on the “Text” tab and type in the desired width and height for the Font.
Click on the “Apply” button when you are done.
Step Three: Cut the Font
The last step is to cut the Font. To do this, click on the “Make It” button and select the material you want to use.
Click on the “Cut” button and wait for the Cricut to finish cutting. And that’s it! You have now successfully cut a font using your Cricut machine.
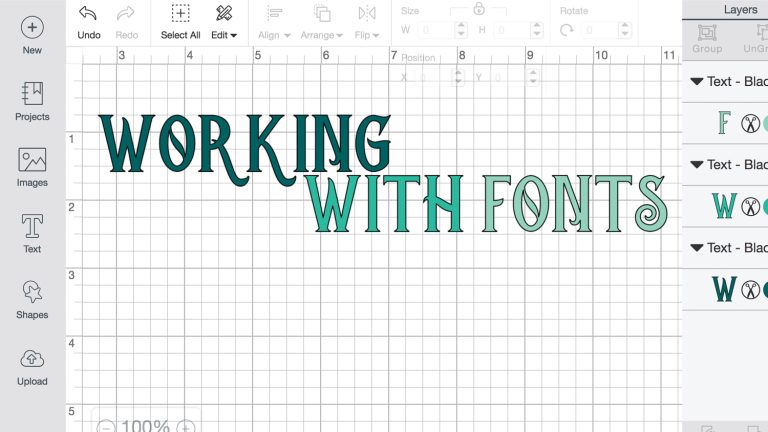
What fonts are available to use?
There are over 100 fonts available to use with the Cricut cutting machine. The fonts are divided into two groups, standard, and premium. Standard fonts are free to use, while premium fonts cost a small fee. To change the Font on your Cricut, select the text you want to change and then choose the new Font from the list. You can also change the Font’s size, color, and style. If you’re not sure which Font to use, try out a few different ones until you find one that you like. Have fun experimenting!
How to find and install new fonts?
If you’re looking for new fonts with your Cricut machine, there are a few different ways to find and install them. You can purchase fonts from the Cricut Design Space Marketplace, download free fonts from websites like Dafont.com, or even create your custom fonts using the Font Maker tool in Cricut Design Space.
Once you’ve found the perfect Font for your project, installing it on your Cricut machine is easy. Just open up Cricut Design Space and click on the “Add Fonts” button in the upper-left corner of the screen. You can either upload a .ttf or .otf file from your computer or paste in a link to a downloadable font file.
Once the Font is installed, it will be available in all of your Cricut Design Space projects. So go ahead and start exploring all the fantastic fonts out there – your imagination only limits your creativity!
Are there free fonts on Cricut Design?
There are free fonts available on Cricut Design Space. To access them, open the Fonts menu and select “Get More Fonts.” You can then browse through the available fonts and add them to your project.
If you’re looking for more font options, there are many great places to find fonts online. A quick search will turn up a variety of free and paid font options. Once you’ve found the perfect Font, you can download it and add it to your Cricut Design Space account. To do this, open the “Upload” menu and select “Upload Font.” Then, follow the prompts to add the Font to your account.
How to edit the text in Cricut Design Space?
To edit the text in your design:
-Click on the Text icon in the left toolbar.
-Click on the layer you want to edit in the Layers panel.
-In the Edit Text window, make your changes.
-Click Apply to save your changes.
You can also change the Font by clicking on the Font drop-down menu in the Edit Text window.
Tips for using different fonts in your projects
There are a few things to keep in mind when using different fonts in your projects. First, make sure that the Font you select is legible. You want people to be able to read the text easily. Second, consider the overall look of the project. The Font you choose should complement the other elements in the design.
Here are some tips for using different fonts in your projects:
– Make sure the Font is legible
– Consider the overall look of the project
– Use a contrasting color for the text
– Choose a font that reflects the tone of the project
– Experiment with different fonts to find the perfect one for your project!
Why can’t I edit the text in the Cricut design space?
If you’re trying to edit the text in Cricut Design Space, but nothing is happening, it’s likely because the Font is set to “writable.” To change the Font:
– Select the text box you want to edit
– In the top toolbar, click on the “Text” tab
– Under “Font Family,” select the Font you want to use
– The text in your text box will now be editable!
You can also change the color of your text and the alignment, spacing, and more. Experiment with different fonts and settings until you find a look you love! And don’t forget – you can permanently save your designs so you can use them again in the future.
How to add flourishes to fonts in the Cricut design space?
It’s easy to add flourishes to fonts in the Cricut design space. Just follow these simple steps:
First, open the Design Space app and click on the “Text” tool.
Next, type out the word or phrase you want to add flourishes.
Then, click on the “Add Flourish” icon.
A new window will open with a variety of flourishes to choose from. Click on the one you want to add to your text.
Finally, click on the “Apply” button and the “Done” button.
Your text will now have a beautiful flourish added to it!
You can repeat these steps to add flourishes to as many words or phrases as you like.
So there you have it! Here are a few tips on how to change fonts on your Cricut. If you have any questions or run into any problems, feel free to reach out to us for help. We hope these tips will help you create the perfect project with just the right Font! Happy Crafting!


